Stashing your rack sounds simple, right? That’s what I thought—until winter rolled in and my bike rack became a permanent garage decoration. It stood there awkwardly, half-folded, collecting dust, and occasionally getting knocked over. After a few seasons of trial and error, I finally figured out a routine that works. If you’ve been winging it like I did, it’s time for an upgrade.
To properly store a hitch-mounted platform bike rack during the off-season, give it a good cleaning, inspect all moving parts, disassemble if necessary, and store it off the floor in a dry, sheltered space.
Don’t just toss it in a corner and walk away. A few simple steps now can save you a lot of frustration next season—no squeaks, no rust, no surprises. Let’s break it down.

Step 1: Clean It Like You Mean It
No one would store a muddy bike, right? So why treat your rack any differently?
Give your platform rack a full wash with mild soap and water. Dry it completely to avoid rust and buildup.
Cleaning Is Not Optional
I learned this one the hard way. One spring, I pulled my rack out to find it crusty with salt, spider webs, and some mystery goo that I still can’t explain. If you live somewhere with snowy roads or sea air, skipping this step is a guaranteed regret.
🧼 What You’ll Need:
|
Item |
Purpose |
|---|---|
|
Mild detergent |
Gets rid of grime without harming the finish |
|
Soft brush or sponge |
Cleans tight spots without scratching |
|
Microfiber towel |
Helps dry it fully to prevent corrosion |
And don’t forget to check the inside of the receiver tube. Gunk tends to collect there—and you really don’t want that messing with your next mount-up.
Step 2: Inspect and Tighten Everything
That little wobble you ignored last summer? It’s not going to fix itself while in storage.
Look over every bolt, hinge, cradle, and latch. Tighten what’s loose. Replace anything worn or cracked.
Catch Problems Before They Get Worse
Winter’s actually the perfect time for this kind of maintenance. You’re not rushing to get out the door for a ride, so take a few minutes to do it right.
🔧 Checklist:
-
Bolts — Tight? Any signs of rust?
-
Folding arms — Do they move smoothly?
-
Rubber straps/cradles — Are they drying out or cracked?
-
Hitch tongue — Still straight? Any chipped paint or dings?
Grab a wrench and do a quick once-over. It only takes a few minutes now but saves you from a disaster in the spring.

Step 3: Decide Whether to Disassemble
Should you store it fully built? Fold it down? Take it apart completely? It depends on how much space you’ve got.
If you’re short on room, folding or disassembling is the way to go. Just make sure you keep track of all the small parts.
Storing Whole vs. In Pieces
I used to keep my rack fully assembled and just lean it against the wall. It worked—until I moved into a smaller place and it started blocking everything. That’s when I discovered how useful disassembling could be.
🧩 Pros & Cons:
|
Method |
Pros |
Cons |
|---|---|---|
|
Fully Assembled |
Fast setup in spring |
Takes up more space |
|
Folded |
Easier to store |
Still a bit bulky |
|
Fully Disassembled |
Super compact |
Reassembly takes time, easy to misplace parts |
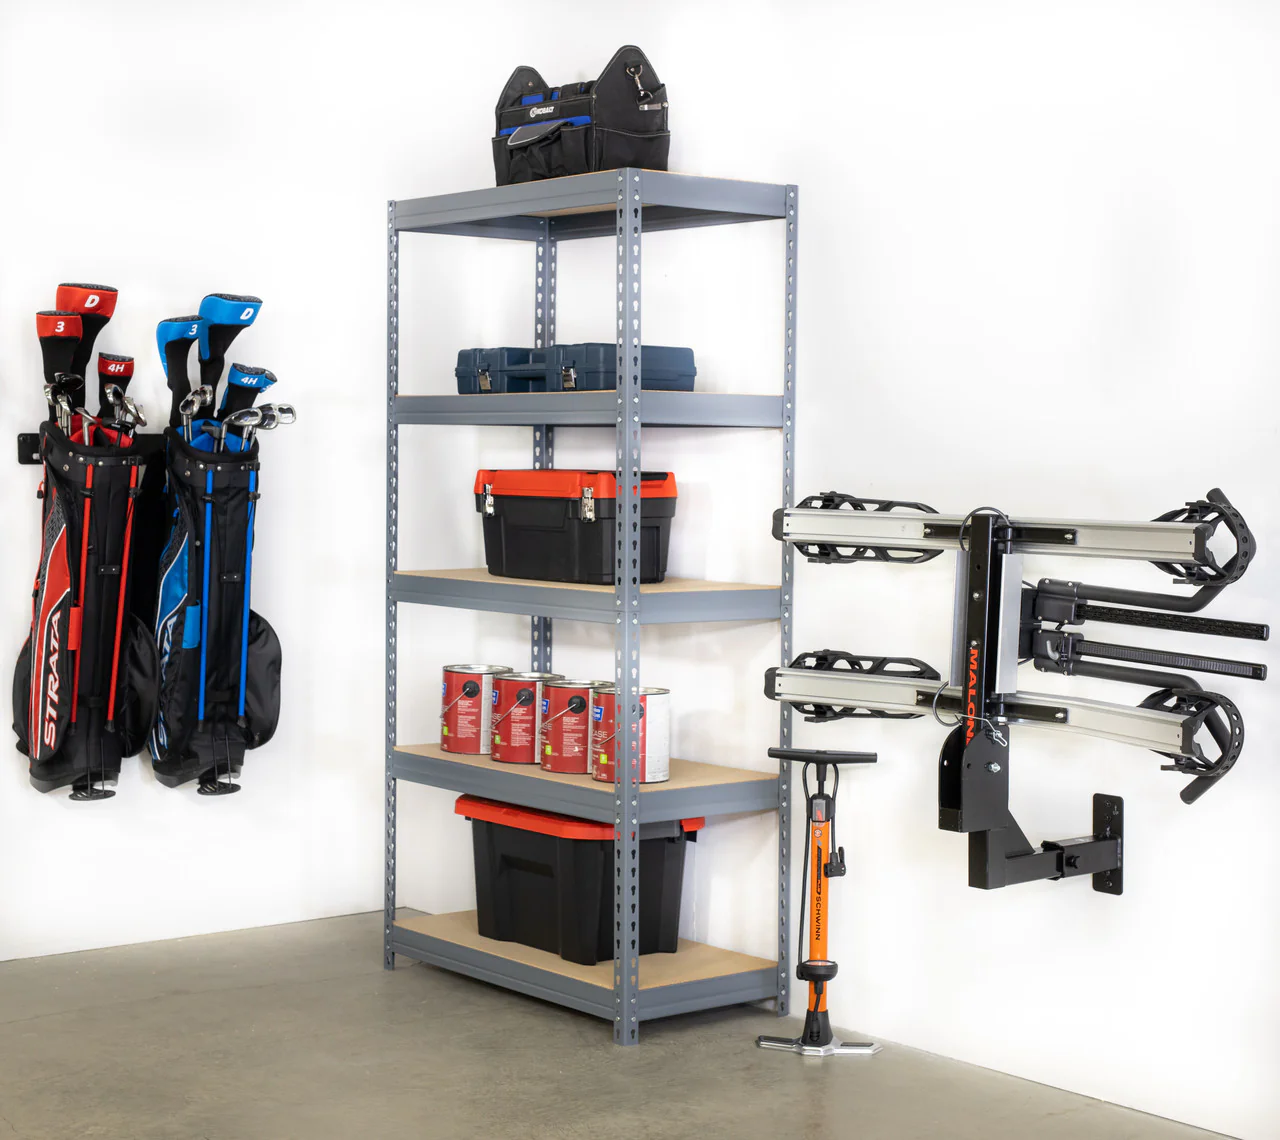
If you have wall hooks or a stand, great. If not, floor storage can still work—just use something underneath like a mat or towel so it’s not sitting directly on concrete.
Step 4: Choose the Right Spot
Storing your rack in the wrong place can quietly wreck it.
The best place is dry, indoors, and elevated. Think garage wall, shed shelf, or utility closet. Just don’t leave it outside or on the floor.
Storage Environment Matters
You wouldn’t park your bike out in the snow all winter (hopefully). Your rack deserves the same level of care.
🌡️ Keep in Mind:
-
Dry area – Prevents rust and mold
-
No sunlight – UV rays age plastic and rubber
-
Consistent temperature – Extreme cold or heat can warp things
-
Off the ground – Stops damage from spills, flooding, pests, or feet
🛠️ Simple Storage Ideas
Even big, heavy racks can be stored smart with a little creativity.
Wall Hooks
Mount strong hooks into wall studs and hang the rack vertically by its arms or spine. Easy access, no floor clutter.
Freestanding Rack
No drill? Use a moveable floor stand. It keeps your rack upright and out of the way.
Ceiling Hoist
Short on space? Hang it up high with a basic pulley system. Just double-check it's secured.
Under a Shelf
If you disassembled it, stash the parts under a shelf using labeled bins or zip ties on hooks.
The key is keeping it clean, dry, and out of the way—not shoved in a random corner gathering dust.
Step 5: Cover It Up
A cover might feel like overkill—but it’s not.
Even indoors, covering your rack protects it from dust, scratches, and all kinds of surprise messes.
Why a Cover Is Totally Worth It
I used to think this part was just “extra.” Until I left mine uncovered and had to clean off months of grime and sawdust before my first spring ride.
Covers also protect from:
-
Random garage spills (oil, paint—you name it)
-
Curious pets or toddlers
-
Bugs, webs, and dust that somehow appear overnight
If you’ve taken the rack apart, store small parts in labeled bags. Use ziplocks, masking tape, whatever works. Just don’t leave yourself a puzzle when spring comes.
Conclusion
Storing your platform rack right doesn’t take much effort—but it pays off big. A quick wash, a basic check, smart storage, and a simple cover are all it takes. Trust me—your future self will thank you. Next season, instead of wrestling with rusted bolts or dusty straps, you’ll be mounting up and rolling out in minutes. Easy. Clean. Done.